Home » Maintenance Guide for Trailer Wiring Harnesses and Plugs
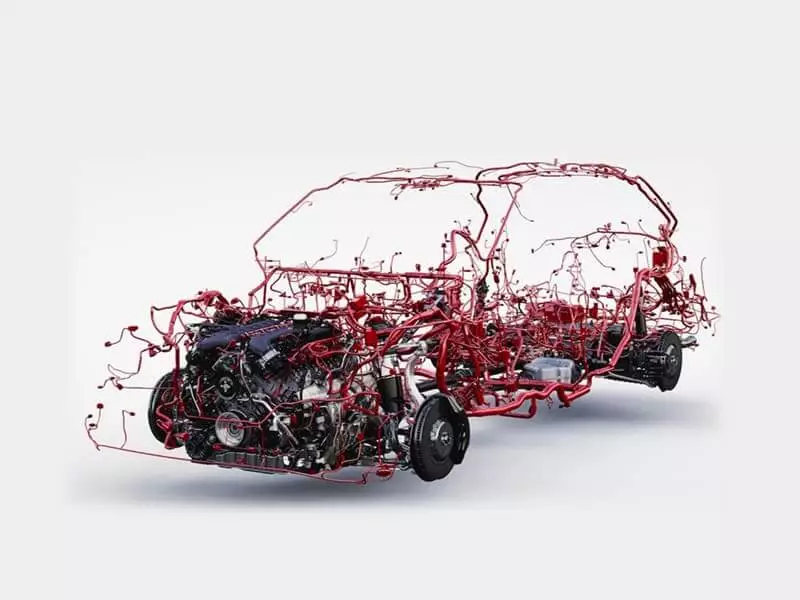
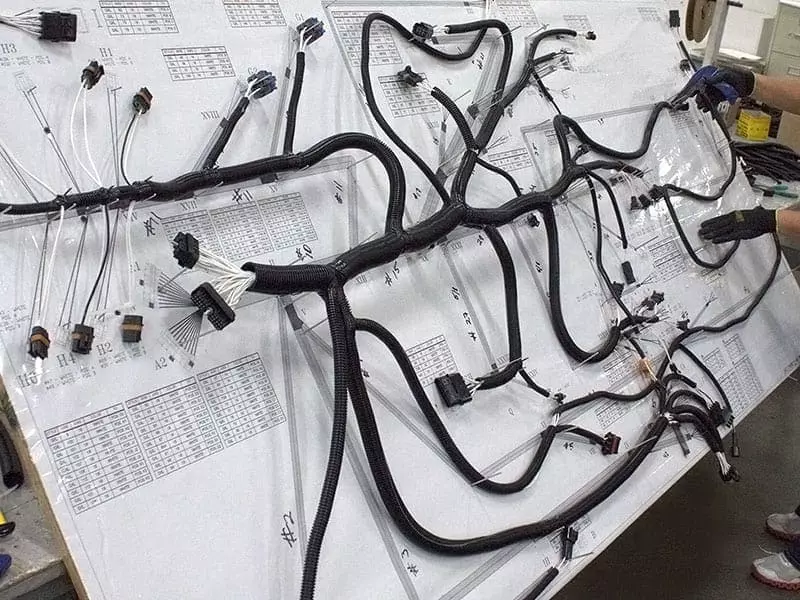
A trailer wiring harness serves as the physical conduit for the electrical system between the tractor and the trailer. Functions such as lighting signals, brake commands, charging, and communication rely on this conduit for transmission. However, because it is constantly exposed to prolonged vibration, rain, and oil contamination, potential hazards include aging and cracking of the insulation, oxidation and corrosion of connectors, and poor terminal contact.
Therefore, establishing a systematic maintenance plan and clear inspection schedules is crucial for ensuring driving safety. This article provides a comprehensive guide to trailer wiring harness maintenance, covering key points for daily inspections, periodic maintenance standards, diagnosis of common faults, and recommended inspection intervals.
What trailer wiring maintenance should be done before every trip?
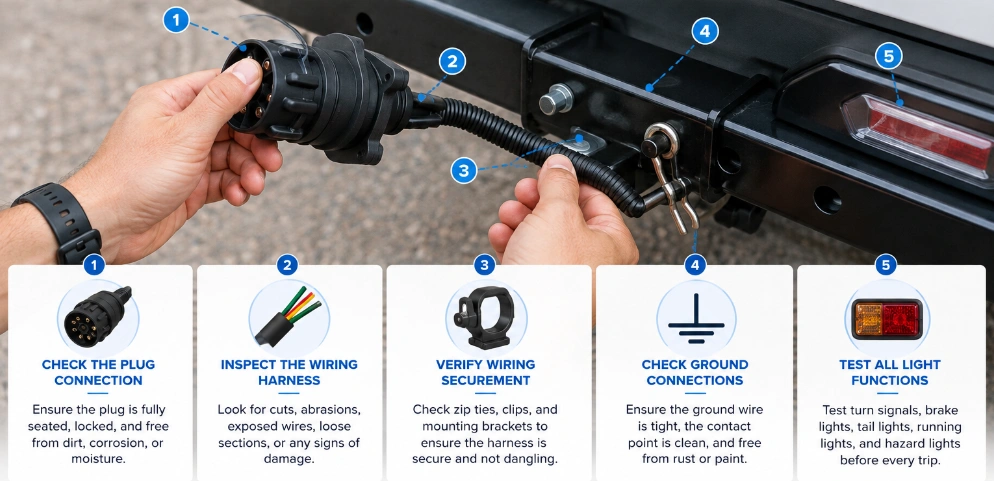
Before every trip with a trailer, we recommend performing a quick inspection of the wiring harness.
1. Inspect the trailer plug and vehicle receptacle
Check that the trailer plug is securely connected to the vehicle receptacle. Inspect the pins and terminals for oxidation, corrosion, bending, looseness, or contamination, and ensure the plug housing has no cracks.
For trailers frequently used in rainy or snowy conditions, we recommend paying special attention to checking the interior of the connectors for moisture or signs of corrosion.
2. Inspect the Wiring Harness Sheathing and Wires
Inspect the trailer’s wiring harness along its entire length, paying special attention to areas near the chassis, axles, suspension, and wiring harness mounting points.
If you find any damage to the sheathing, exposed wires, flattened sections, cuts, or obvious wear, address the issue promptly. Pay particular attention to whether the wiring harness is rubbing against metal edges, tires, or moving parts, as this could further damage the insulation.
3. Check That the Wiring Harness Is Securely Fastened
Confirm that the wiring harness’s cable ties, clips, and fasteners are secure; avoid any noticeable looseness or sagging.
The wiring harness should not be pulled too tight, and excess cable should not dangle near tires, the exhaust system, or moving suspension components.
4. Check the ground connection
Before driving, check that the ground wire is securely connected to the vehicle frame, and inspect the connection point for rust or oil residue. If the ground connection shows signs of corrosion, clean it promptly and re-establish metal-to-metal contact.
5. Test the Trailer Lights
Once the connection is complete, you need to test the following:
- Left turn signal
- Right turn signal
- Brake lights
- Parking lights/tail lights
- Hazard lights
- Reverse lights
During the test, have another person stand behind the trailer to observe, or use an appropriate trailer wiring tester.
6. Inspect the Connectors and Waterproofing
If the trailer is frequently used in rainy, muddy, or water-crossing conditions, pay special attention to the connector’s O-rings, waterproof sleeves, and protective housing. Replace any seals that are aged, cracked, or missing immediately.
7. Final Verification
After completing the inspection, double-check that the trailer plug is fully inserted and secured, and ensure all wiring harnesses are kept away from tires, exhaust pipes, sharp metal edges, and moving parts.
Tip: Based on our many years of experience in the industry, don’t just check whether the lights are on. The fact that the lights are working properly doesn’t mean there are no potential issues with the connectors, grounding, or the security of the wiring harness. We recommend performing a visual inspection, a connector check, and a light function test every time before you set out on a trip.
Trailer wiring inspection schedule
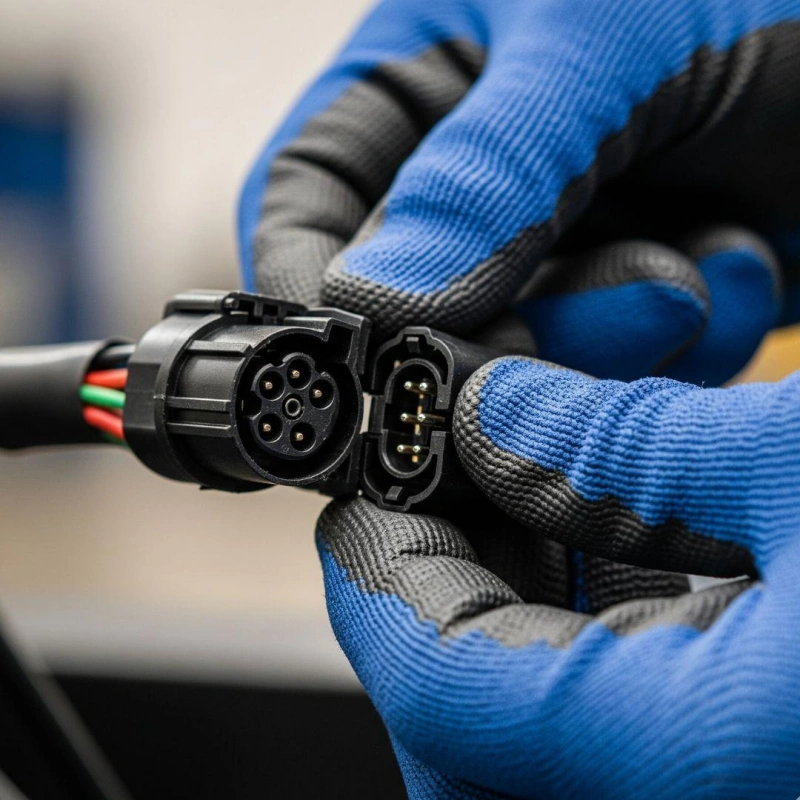
Trailer wiring harnesses should not be inspected only after a malfunction occurs. Since wiring harnesses are constantly exposed to vibration, bending, moisture, dirt and sand, temperature fluctuations, and mechanical friction, a tiered inspection schedule should be established based on frequency of use, driving conditions, and the condition of the wiring harness.
| Inspection Item | Recommended Inspection Frequency | Key Inspection Points | Issues to Watch For |
|---|---|---|---|
| Pre-Trip Quick Check | Before every trip | Plug connection, harness condition, mounting points, and lighting functions | Loose plug, sagging cables, damaged insulation, lights not working |
| Connector Inspection | Once a month | Pins, terminals, seals, and socket condition | Oxidation, corrosion, bent pins, looseness, water ingress |
| Harness Insulation Inspection | Once a month | Cables around the frame, axle, and suspension areas | Abrasion, cuts, crushing, cracked insulation |
| Mounting Point Inspection | Every 1–3 months | Cable ties, clips, harness clamps, and mounting locations | Loose fasteners, cable movement, contact with sharp metal edges |
| Grounding System Inspection | Every 3 months | Ground wires, grounding points, and frame connections | Rust, looseness, paint covering the contact area, poor electrical contact |
| Complete Lighting System Test | Every 3 months | Turn signals, brake lights, tail lights, marker lights, and hazard lights | Flickering lights, abnormal brightness, multiple lights failing simultaneously |
| Waterproofing Inspection | Every 3–6 months | Plug seals, waterproof boots, and connection points | Aged or cracked seals, damaged waterproofing, water ingress |
| Complete Harness Inspection | Every 6 months | Overall harness routing, connectors, branches, and wear points | Aging, hardening, severe corrosion, loose connections |
| Frequently Used Trailers | Complete inspection every 1–3 months | Connectors, mounting points, grounding, and high-wear areas | Vibration-induced loosening, broken wires caused by repeated bending |
| After Exposure to Water or Mud | Inspect after every use | Plugs, connectors, and low-mounted harness sections | Mud buildup, water ingress, corrosion |
| After Extreme Weather or Long-Distance Transport | Inspect promptly after use | Harness mounting, insulation, plugs, and lighting functions | Pulling, abrasion, loosening, mechanical damage |
| After an Abnormality Is Found | Inspect immediately | Troubleshoot the affected circuit | Lighting failure, intermittent power loss, repeatedly blown fuses |
Inspect plugs, sockets and pin tension
The plugs, sockets, and terminals of a trailer wiring harness are critical components of the electrical circuit. The mating precision between the plug and socket determines the stability of the mechanical connection, while the clamping force of the terminals determines the reliability of the electrical contact.
1. Check the connection between the plug and socket
After fully inserting the trailer plug into the vehicle’s socket, gently pull on the plug to check the connection. Under normal circumstances, there should be no noticeable looseness or spontaneous disconnection.
You should also check the plug and socket housings for cracks, deformation, looseness, or damage to the sealing structure. If the connectors cannot maintain a stable connection, vibration during driving may cause momentary power interruptions.
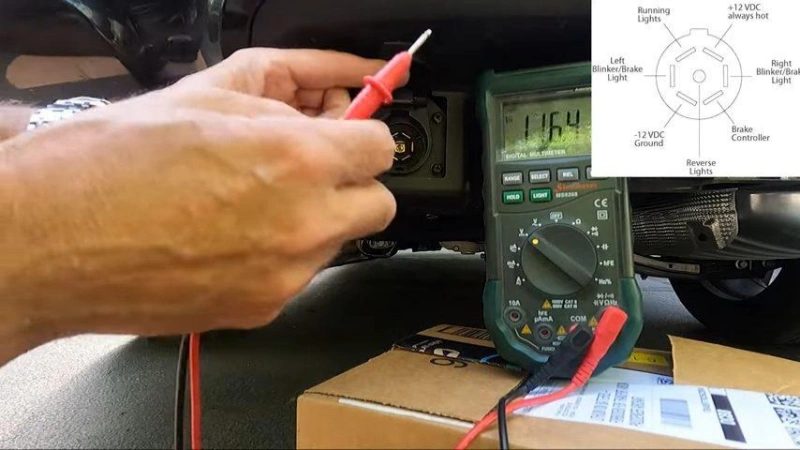
2. Check the terminal clamping force
During inspection, pay close attention to the following areas:
- Condition of the spring contacts: Pull the connector out to check whether the spring contacts inside the terminals have been stretched, flattened, or bent out of alignment.
- Insertion feel: When reinserting the connector, pay attention to the feel. If it feels noticeably loose with little resistance, it indicates that the terminals have become loose and need to be addressed.
- Pin stability: Gently wiggle the pin to see if it comes out easily. Under normal conditions, the pin should be securely locked in place.
- Insertion and removal resistance: Normal insertion and removal should provide a moderate amount of resistance—the connector should guide the pin into place when inserted, and removal should require some force but not be overly difficult.
Inspect cable routing, loom and strain relief
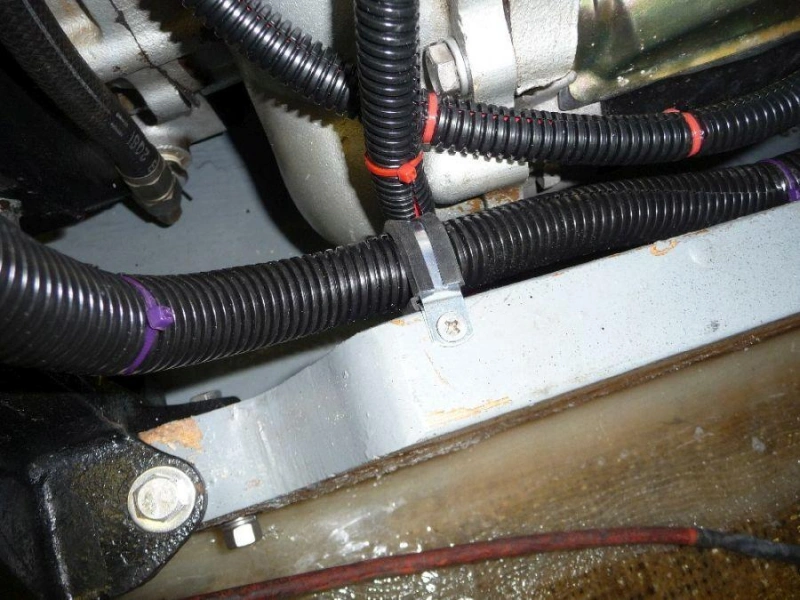
Trailer wiring harnesses are subject to vibration, bending, stretching, and friction while the vehicle is in motion. Therefore, when inspecting the wiring harness, it is necessary to verify that the cable routing is appropriate, that the protective sleeves are intact, and that the connector locations provide sufficient strain relief.
A. Cable Routing Inspection
The key to cable routing is to minimize unnecessary stretching, bending, and friction on the wiring harness while the vehicle is in motion.
Slack and Looseness: An appropriate amount of slack must be maintained in the wiring harness near the tow ball to prevent it from becoming taut during maximum steering angles and maximum suspension travel. The criterion is that, when the tow vehicle and trailer are at their maximum steering angles, the lowest point of the wiring harness should have at least approximately 50 mm of slack.
Routing Path: The wiring harness should be routed away from high-temperature exhaust pipes, rotating components, and sharp metal edges, and must not come into direct contact with the vehicle’s body panels.
Mounting Points: All mounting clips must be present and secure, spaced approximately every 300 mm to 500 mm.
B.Wiring Harness Protective Sleeving Inspection
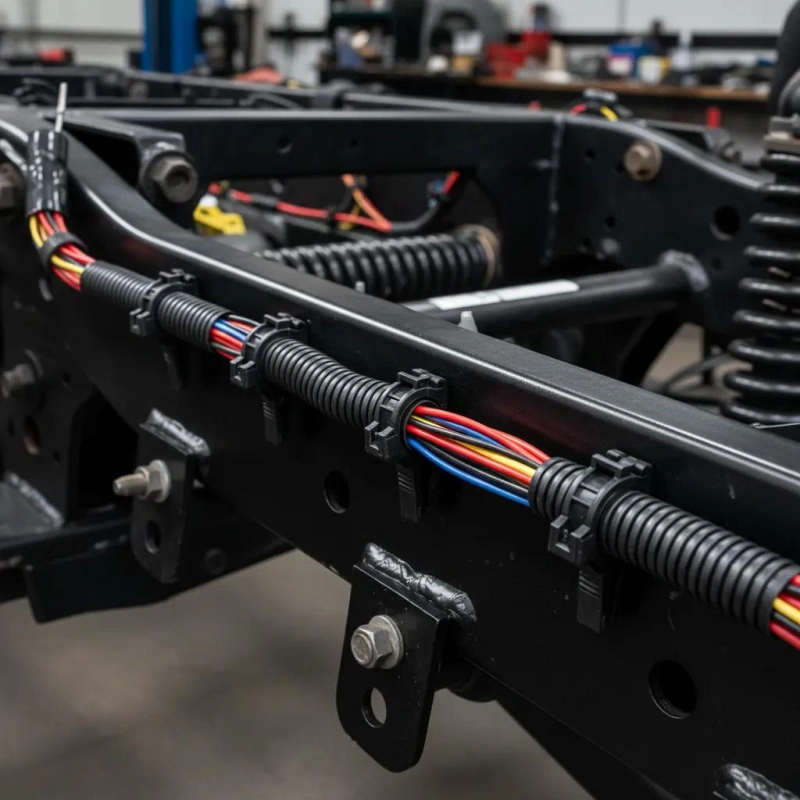
The primary function of protective sleeving is to reduce the risk of mechanical wear, impact, moisture, and contamination affecting the wiring harness.
Corrugated Tubing/Braided Sleeves: Check the corrugated tubing for cracks, flattening, or aging and brittleness. If damaged, the wiring harness will be exposed and the protective function will be lost.
Heat-Shrink Tubing: Check whether the heat-shrink tubing at wire harness branch points and terminal crimp connections is fully intact and free of cracks or peeling. Heat-shrink tubing not only provides insulation but also serves as a waterproof seal.
Tape Wrapping: Some wire harnesses are protected by wrapping with PVC tape or flannel tape. Check whether the tape is loose, peeling, or has become sticky or deteriorated.
Tip: Thicker protective sleeves are not necessarily better. Depending on the installation location, factors such as abrasion resistance, flexibility, temperature resistance, and protection requirements must be considered. When selecting a wiring harness, choose a protective structure that is appropriate for the actual operating environment.
C. Stress Relief Inspection
Stress relief is often the most easily overlooked aspect.
- Key Inspection Points:Tail Clamping: Verify that the cable clamping structure at the connector tail securely locks the wire jacket in place. Gently pull the wire by hand to observe whether it remains fixed at the clamping point.
- Stress Cone/Transition Section: Check the transition area between the connector tail and the wiring harness for any obvious kinks or stress concentrations.
- Potting Compound Condition: Check whether the potting compound shows any cracking, peeling, or delamination from the housing.
Tip: Wiring harness failures may begin with “prolonged stress.” During installation, do not allow the connector to bear the weight of the wiring harness, and do not secure the wiring harness too tightly. Avoid sharp bends and stress concentrations where the wiring harness enters the connector, branch connectors, and vehicle frame corners.
Inspect grounds and junction boxes
1. Grounding Connection Inspection
- Grounding Point Location: The grounding wire on the trailer end is typically secured to the metal structure of the frame or chassis with a bolt. Check that the grounding point is located on a dry, rust-free metal surface.
- Connection Tightness: Verify that the grounding bolt is tightened and not loose. Gently shake the grounding wire by hand to check for any movement at the grounding point.
- Condition of the Ground Wire: Check the ground wire for broken strands, corrosion, or damaged insulation. The cross-sectional area of the ground wire should match that of the main power cable.
- Ground Loop Resistance: Use a multimeter to measure the total resistance of the ground loop. The normal value should be less than 1 Ω; a high resistance value indicates oxidation or poor contact at the grounding point, requiring the area to be sanded and cleaned before retightening.
2. Junction Box Inspection
The junction box serves as the hub for wire harness branching and circuit distribution, integrating terminal blocks, fuse holders, and a waterproof seal.
Box Integrity: Check the junction box housing for cracks, deformation, or seal failure. Damage to the box allows moisture and dust to enter, accelerating terminal oxidation and short circuits.
Internal Terminal Condition: Open the junction box and inspect each connection point on the internal terminal block one by one. Verify that the wires are securely crimped with no looseness and that the terminal surfaces show no signs of oxidation or corrosion. Whether the terminals inside the junction box use screw crimping or spring clamping, ensure that the clamping force is sufficient.
Fuse Condition: Check that the fuses for each circuit are intact and that their specifications match the circuit’s rated current.
Waterproof Sealing: Check that the junction box’s sealing rings and the waterproof rubber grommets at the cable entry points are intact.
How should trailer connectors be cleaned and protected?
Trailer connectors are constantly exposed to vibration, rain, mud, salt spray, and alternating high and low temperatures. Oxidation and corrosion on the terminal surfaces, as well as aging and failure of the sealing structures, are the primary causes of increased contact resistance, signal interruptions, and even circuit burnout. Therefore, it is important to clean and protect trailer connectors.
I. Preparations Before Cleaning
Disconnect Power: Disconnect the trailer connector from the vehicle’s power supply before cleaning.
Prepare Tools:
- 99.9% anhydrous ethanol or specialized electronic contact cleaner
- Soft-bristled brush
- Clean, lint-free cloth or microfiber cloth
- Compressed air or low-power hair dryer
- Dielectric grease
- Nitrile gloves
II. Cleaning Steps
Step 1: External Cleaning
Dip a soft-bristle brush in a small amount of warm water mixed with a neutral detergent, and brush along the length of the connector housing to remove surface dirt, oil, and salt deposits.
Step 2: Deep Cleaning of Terminals
After unplugging the connector, spray anhydrous ethanol or contact cleaner onto a soft-bristle brush and gently brush the terminal surfaces in a single direction to remove oxidation and dirt.
For stubborn oxidation, use a specialized terminal cleaning tool or very fine sandpaper (1000 grit or higher) to sand the surface extremely gently.
Once cleaning is complete, use compressed air to blow away any residual liquid inside the terminal chamber.
Step 3: Cleaning the Housing and Sealing Ring
Dip a lint-free cloth in a small amount of anhydrous ethanol and wipe the inner walls of the connector housing and the surface of the sealing ring to remove dirt and aged debris adhering to the sealing ring.
III. Protective Measures
Proper Use of Dielectric Grease: Apply an extremely thin layer of dielectric grease to the terminal contact surfaces. When applying, note the following Use as little as possible; a thin layer is sufficient.
Prioritize applying the grease to the inner walls of the terminal sockets and the surfaces of the sealing rings; apply only a small amount to the pin ends.
Electronic Contact Protective Agents: Unlike dielectric grease, these protective agents combine electrical conductivity with anti-oxidation properties. They form an extremely thin protective film on the terminal contact surfaces, isolating corrosive media while maintaining electrical conductivity. They are suitable for applications requiring extremely high contact reliability.
Waterproof Sleeves and Dust Caps: When connectors are not in use, dust caps or waterproof sleeves should be installed to prevent dust, rain, and foreign objects from entering the terminal chamber.
How do saltwater, road salt and storage change maintenance?
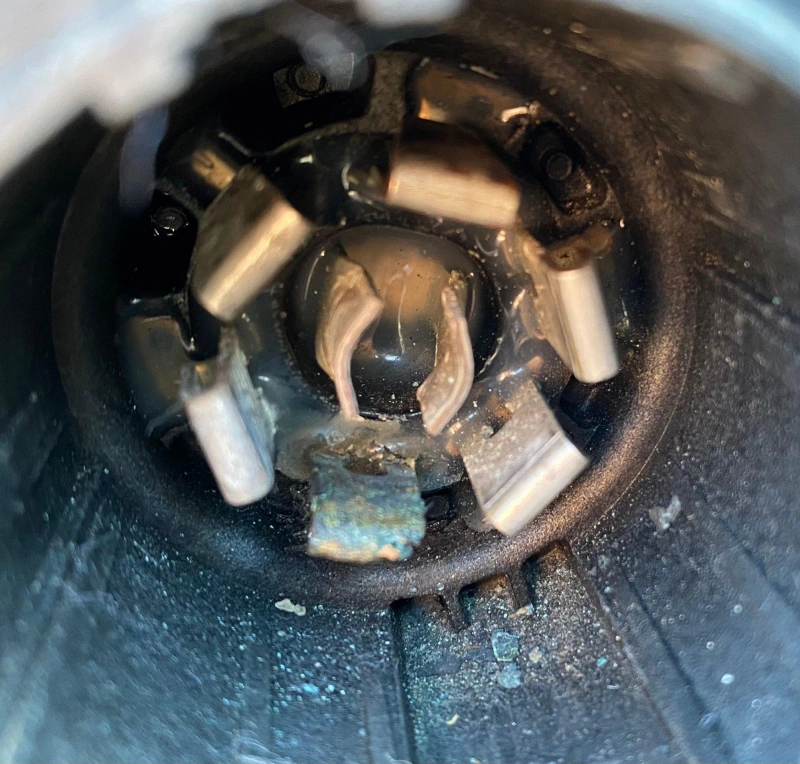
Saltwater, road de-icing salt, and prolonged parking can all accelerate corrosion of the trailer’s wiring harness, cause the insulation to age, and degrade connection performance. Therefore, when using or storing a trailer in these environments, be sure to follow the recommended maintenance schedule.
1. Saltwater Environments
When driving in coastal areas, near beaches, or on roads with saltwater, salt can easily adhere to the surface of wiring harnesses, plugs, and the vehicle frame. Saltwater has strong electrolyte properties, which accelerate the electrochemical corrosion of metal terminals.
Key Inspection Points:
- Check for oxidation, discoloration, or corrosion deposits on plug and socket terminals;
- Check for rust or corrosion on grounding connection points;
- Check that the junction box seals are intact and that there are no signs of water or salt residue inside;
- Check for damage to the wiring harness protective sleeves and connectors.
II. Road De-icing Salt
The chlorides in road de-icing salt increase the risk of metal corrosion. As vehicles travel, de-icing salt solution is picked up by tires and standing water on the road and adheres to the trailer chassis, wiring harnesses, connectors, and grounding points.
Recommendations after winter use:
1. Remove salt and dirt from the surfaces of wiring harnesses and connectors;
2. Check the interior of plugs for moisture or corrosion;
3. Check grounding points for rust;
4. Ensure protective covers are not damaged by low temperatures or mechanical friction;
5. After cleaning, allow components to dry thoroughly, then recheck the seals on the connectors.
III. Long-Term Storage
When a trailer is parked for an extended period, even though the wiring harness is not continuously subjected to vehicle vibrations, maintenance should not be neglected.
Before long-term storage, pay special attention to the following:
- Whether the plugs and sockets are clean and dry;
- Whether the junction boxes are properly sealed;
- Whether the wiring harness protective sleeves show signs of aging or cracking;
- Whether the grounding points are secure and free of visible corrosion;
- Whether the wiring harness has been subjected to prolonged compression, kinking, or sagging.
When should a harness be repaired or replaced?
When a problem occurs with a trailer wiring harness, you can determine whether to perform a partial repair or a complete replacement based on the extent of the damage, the location of the fault, the extent of corrosion, and the electrical performance.
| Failure Symptom | Assessment Criteria | Repair / Replacement Recommendation |
|---|---|---|
| Localized Insulation Damage | ≤2 damaged points; copper conductor not exposed or only slightly oxidized; damage length <20 mm | Repair: Remove the damaged section, splice with a conductor of the same specification, and seal the joint with heat-shrink tubing. Perform an insulation resistance test after the repair (≥1 MΩ). |
| Widespread Insulation Aging | Insulation has yellowed or become brittle, multiple cracks are present, or copper conductors are widely exposed or oxidized | Replace: Widespread insulation deterioration indicates that the harness is approaching the end of its service life. Local patching cannot restore overall insulation reliability. |
| Minor Terminal Oxidation | Light white or green oxidation is present, but the metal substrate remains intact and contact resistance is <50 mΩ after cleaning | Repair: Remove oxidation with an appropriate electrical contact cleaner, apply a suitable dielectric grease if specified by the connector manufacturer, and reinstall the terminal. |
| Severe Terminal Corrosion or Plating Loss | More than 30% of the plating has deteriorated, or the terminal shows pitting or extensive exposure of the copper substrate | Replace: Once terminal plating is significantly damaged, corrosion can progress rapidly. Cleaning may provide only temporary improvement; replacement of the connector assembly is recommended. |
| Single Conductor Open Circuit | A multimeter confirms an open circuit in one circuit while the remaining circuits operate normally | Repair: Locate the damaged section, remove it, and splice in a conductor of the same specification. If the conductor has an internal break with no visible external damage, inspect the entire harness section for hidden damage. |
| Multiple Conductors Open Circuit | Three or more circuits experience open-circuit or intermittent faults at the same time | Replace: Multiple circuit failures may indicate severe mechanical damage, environmental deterioration, or another underlying harness-level problem. The overall reliability of the harness should be reassessed before continued use. |
| Cracked or Deformed Connector Housing | Visible cracks, broken locking tabs, or permanently deformed seals are present | Replace: Housing damage can compromise the connector's mechanical retention and sealing performance, allowing moisture to enter and accelerate terminal corrosion. |
| High Ground-Circuit Resistance | Ground connection shows excessive resistance or the grounding point has significant corrosion | Repair: Clean the grounding surface to restore a sound metal-to-metal connection and retighten the fastener. If the original grounding point is severely corroded, relocate the connection to a suitable grounding point. |
| Recurring Failure in the Same Circuit | The same circuit continues to experience open circuits, shorts, or poor connections after two or more repairs | Replace: Repeated failures often indicate an underlying issue, such as improper routing, excessive bending, vibration, or localized mechanical stress. Repeatedly repairing the same section may not address the root cause. |
| Harness Exposed to Flooding or Fire | The harness has been fully submerged in water or exposed to significant heat or fire damage | Replace: Water can penetrate connectors, splices, and other internal areas that are difficult to dry completely. Heat or fire can permanently degrade insulation and other materials. Replacement is generally preferred over localized repair. |
| Excessive Harness Age | Harness has been in service for more than 10 years and shows multiple signs of aging or deterioration | Replace: Service life depends on materials, operating environment, installation quality, and usage conditions. When multiple aging symptoms are present, preventive replacement may be more reliable than repeated emergency repairs. |
| Upgrade or Compatibility Requirements | Trailer functions are upgraded, such as adding electric brakes or auxiliary power, and the existing harness is not adequately rated for the new requirements | Replace: Additional electrical loads may exceed the current-carrying capacity of the existing conductors or connectors. The harness should be replaced or upgraded to match the required current, voltage, connector, and protection specifications. |
Frequently asked questions about trailer harness maintenance
Q1. Should dielectric grease be used on trailer plugs?
It should be used. Apply a thin coat to the inner walls of the terminal sockets and the surface of the O-rings to form a waterproof seal that blocks moisture and oxygen. Never substitute it with butter or petroleum jelly.
Q2.How often should a trailer plug be replaced?
There is no set timeframe; it depends on the condition. Replacement is required when more than 30% of the terminal plating has worn off, the spring contacts have loosened, the housing is cracked, or the O-ring is deformed. With proper maintenance, the product can last 5 to 8 years; in harsh environments, it is recommended to assess its condition every 3 to 5 years.
Q3.Can corroded trailer wires be cleaned and reused?
- Mild oxidation: Can continue to be used after cleaning; apply dielectric grease for protection.
- Moderate corrosion: Sand the surface and test electrical conductivity; if resistance increases by more than 10%, replacement is recommended.
- Severe corrosion : Must be replaced; cannot be repaired.
Q4. How should a trailer be stored to protect wiring?
Before storage, clean the connectors, apply a thin layer of dielectric grease, install the dust caps, and turn off the power. Store in a cool, dry place. Power on the device once every two weeks to prevent passivation, and perform a full functional test before putting it back into service.
Conclusion-Trailer Wiring Harness Maintenance Guide and Inspection Schedule
Trailer wiring harnesses are constantly subjected to multiple stresses, including vibration, moisture, salt fog corrosion, and temperature cycling. Their reliability is critical to the proper functioning of lighting, braking, and signaling circuits. A sound maintenance strategy and standardized inspection schedules can effectively delay terminal oxidation, seal failure, and insulation degradation, thereby reducing the risk of failure.
As a professional wiring harness supplier, Linkwings offers both standardized and customized trailer wiring harness solutions to help customers find the optimal balance between durability, safety, and maintenance costs based on their specific operating conditions.
If you need technical support regarding the selection, installation, or maintenance planning of trailer wiring harnesses, please feel free to contact the Linkwings engineering team.

Nicole
The founder of Linkwings Electronics.
10+ Years Experience | 1000+ Global Projects Completed
Specialized in:
- Custom Wire Harness Assembly
- Automotive & Industrial Cable Harness Manufacturing
- Precision Crimping & Terminal Processing
- OEM / ODM Wire Harness Solutions
Need help with your project?
Let Linkwingselec deliver your next wire harness solution.